


Retaining walls play a crucial role in protecting and enhancing the appearance of any landscape. These structures are designed to prevent soil erosion and stabilize slopes, providing a sturdy and visually appealing solution to uneven terrain. While there are various types of retaining walls available, a durable and long-lasting option is essential for ensuring the safety and structural integrity of your property. However, the process of installing a retaining wall can seem daunting, especially for those without any prior experience. In this step-by-step guide, we will walk you through the process of installing a durable retaining wall, from planning and preparation to construction and finishing touches. With proper planning and the right tools and materials, you can successfully create a retaining wall that not only adds value to your property but also withstands the test of time. So, whether you are a homeowner looking to enhance your backyard or a professional contractor seeking to expand your knowledge, this guide will provide you with all the necessary information to install a durable retaining wall.
Choose the right materials: retaining walls hobart
When it comes to building a durable retaining wall in Hobart, selecting the right materials is crucial. The choice of materials will determine the strength, stability, and longevity of your retaining wall. Opting for high-quality materials that are specifically designed for retaining walls can help ensure that your structure will withstand the test of time. Common materials used for retaining walls Hobart include concrete blocks, natural stone, and timber sleepers. Each material has its own unique characteristics and benefits, so it’s important to consider factors such as cost, aesthetics, and maintenance requirements when making your decision. Consulting with a professional contractor or supplier familiar with retaining walls in Hobart can provide valuable guidance in choosing the right materials for your specific project.
Prepare the area for construction: retaining walls hobart
Preparing the area for construction is an essential step in installing a durable retaining wall in Hobart. Before beginning the construction process, it is important to clear the site of any vegetation, debris, or obstacles that may hinder the installation or compromise the stability of the retaining wall. This involves removing any plants, shrubs, or trees within the designated area. Additionally, it is crucial to assess the ground conditions and ensure proper drainage to prevent water buildup. This may involve excavating the area and creating a suitable base for the retaining wall. By properly preparing the area, you can lay a solid foundation for your retaining wall and ensure its long-lasting stability and functionality.
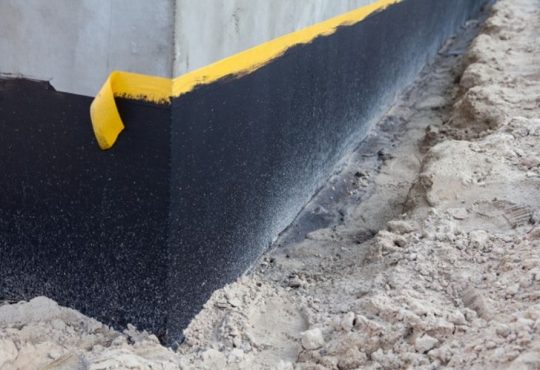
Ensure proper drainage for longevity: retaining walls hobart
To ensure the longevity of your retaining wall in Hobart, proper drainage is crucial. Without adequate drainage, water can accumulate behind the wall, exerting pressure that can lead to instability and potential failure. To prevent this, it is important to incorporate drainage features during the installation process. One effective method is to include weep holes in the retaining wall, which allow for the controlled release of water. These small openings are strategically placed at the base of the wall, allowing water to escape and preventing the build-up of hydrostatic pressure. Furthermore, using gravel or crushed stone as a backfill material can enhance drainage by promoting water flow away from the wall. By ensuring proper drainage for your retaining wall in Hobart, you can increase its longevity and minimize the risk of water-related damage.
Congratulations, you have now successfully installed a durable retaining wall that will improve the functionality and appearance of your landscape. However, it is important to regularly maintain and inspect your retaining wall to ensure its longevity and effectiveness. By following this step-by-step guide, you have not only saved money on hiring a professional, but you have also gained a new skill and accomplished a challenging DIY project. With proper care and upkeep, your retaining wall will continue to serve its purpose for years to come.


